Optical Transfer Function Examples
pyBSM exposes a broad range of sensor parameters (e.g. focal length, aperture, pixel pitch, etc.) and scenario parameters (e.g. altitude, ground range, visibility, etc.) that you can perturb.
This section includes concrete, visualizable examples of perturbations based on the large set of Optical Transfer Function (OTF) parameters that pyBSM provides. OTF parameters can be “perturbed” to simulate different environmental and sensor-based effects.
Each OTF covered here includes a detailed summary, a test input image, and the perturbed result image, along with a code sample.
Setup
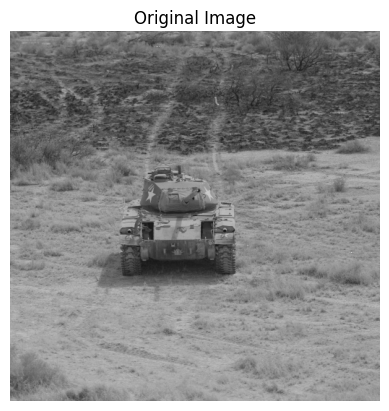
Below is an example of an input image that will undergo a OTF perturbation. This image represents the initial state before any transformation.
import os
import urllib.request

import cv2
import matplotlib.pyplot as plt
import numpy as np

data_dir = "pybsm/data"
os.makedirs(data_dir, exist_ok=True)

url = "https://data.kitware.com/api/v1/item/6596fde89c30d6f4e17c9efc/download"

image_path = os.path.join(data_dir, "M-41 Walker Bulldog (USA) width 319cm height 272cm.tiff")
if not os.path.isfile(image_path):
    _ = urllib.request.urlretrieve(url, image_path)  # noqa: S310


image = np.asarray(cv2.imread(image_path))

fig, ax = plt.subplots()
ax.imshow(image)  # type: ignore
ax.set_title("Original Image")
ax.set_axis_off()  # type: ignore
We will also define a helper function for displaying the original image and the augmented side by side.
def display_augmented_image(original_image: np.ndarray, augmented_image: np.ndarray, augmented_title: str) -> None:
    """Helper function to display the original image and augmented image"""
    _, ax = plt.subplots(1, 2, figsize=(10, 4))
    ax[0].imshow(original_image)  # type: ignore
    ax[0].set_title("Original Image")
    ax[0].set_axis_off()  # type: ignore
    ax[1].imshow(augmented_image)  # type: ignore
    ax[1].set_title(augmented_title)
    ax[1].set_axis_off()  # type: ignore
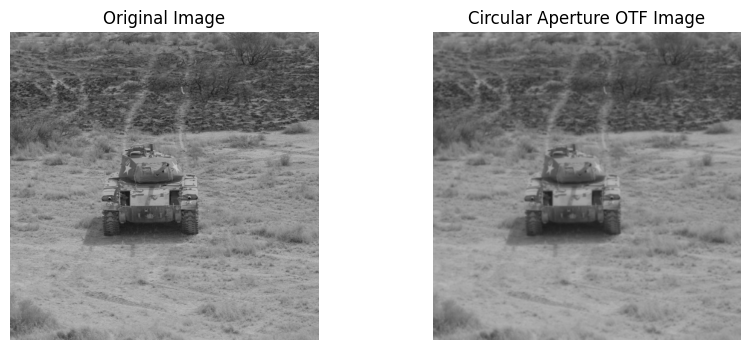
Circular Aperture OTF
The Circular Aperture OTF simulates perturbations based on a circular aperture model. This is an approximation for changes to the model such as changing the lens of the sensor.
Below is some example code that initializes and applies a CircularApertureOTFPerturber. To simulate different circular aperture models, you can adjust mtf_wavelengths and mtf_weights parameters. You can adjust these parameters or use your own image to visualize the perturbation and study the effect on image quality. For more information on customizing CircularApertureOTFPerturber, see the documentation.
import warnings

from nrtk.impls.perturb_image.pybsm.circular_aperture_otf_perturber import CircularApertureOTFPerturber

# There are multiple warnings that appear from calculating arccos and sqrt outside of their domains. This is
# expected and is handled appropriately, but we chose to ignore the warnings to simpilfy the output.
warnings.filterwarnings("ignore")

otf = CircularApertureOTFPerturber(mtf_wavelengths=[0.5e-6, 0.6e-6], mtf_weights=[0.5, 0.5])
circular_aperture_otf_image, _ = otf.perturb(image)
display_augmented_image(image, circular_aperture_otf_image, "Circular Aperture OTF Image")
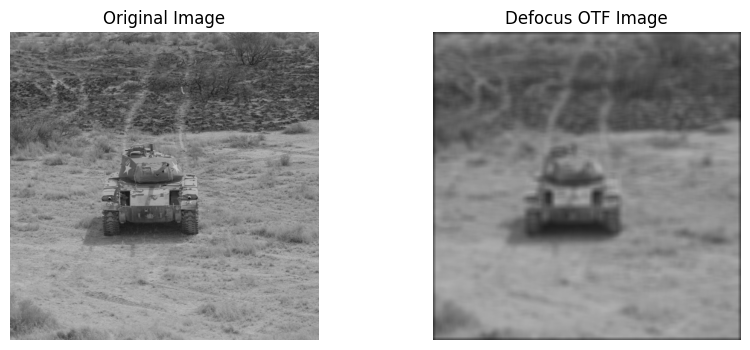
Defocus OTF
The Defocus OTF simulates perturbations based on detector width. This is approximated as a Gaussian blur effect quantified by variance in blur spot radii.
Below is some example code that initializes and applies a DefocusOTFPerturber. To simulate different levels of defocus, you can adjust w_x and w_y parameters. You can adjust these parameters or use your own image to visualize the perturbation and study the effect on image quality. For more information on customizing DefocusOTFPerturber, see the documentation.
from nrtk.impls.perturb_image.pybsm.defocus_otf_perturber import DefocusOTFPerturber

otf = DefocusOTFPerturber(w_x=0.5, w_y=0.5)
defocus_otf_image, _ = otf.perturb(image)
display_augmented_image(image, defocus_otf_image, "Defocus OTF Image")
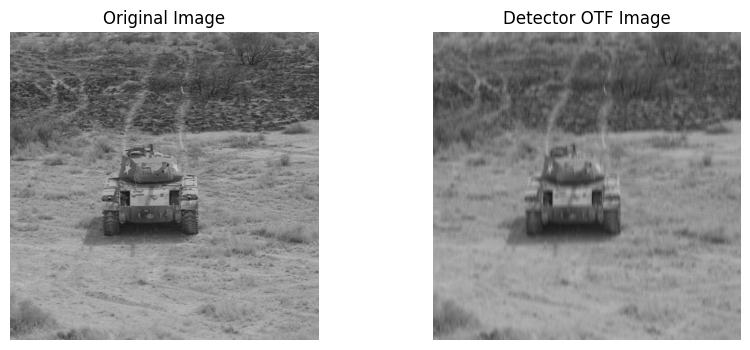
Detector OTF
The Detector OTF simulates perturbations based on detector width. This is blur due to the spatial integrating effects of the detector size.
Below is some example code that initializes and applies a DetectorOTFPerturber. To simulate different detector sizes, you can adjust w_x, w_y, and f parameters. You can adjust these parameters or use your own image to visualize the perturbation and study the effect on image quality. For more information on customizing DetectorOTFPerturber, see the documentation.
from nrtk.impls.perturb_image.pybsm.detector_otf_perturber import DetectorOTFPerturber

otf = DetectorOTFPerturber(w_x=3e-6, w_y=20e-6, f=30e-3)
detector_otf_image, _ = otf.perturb(image)
display_augmented_image(image, detector_otf_image, "Detector OTF Image")
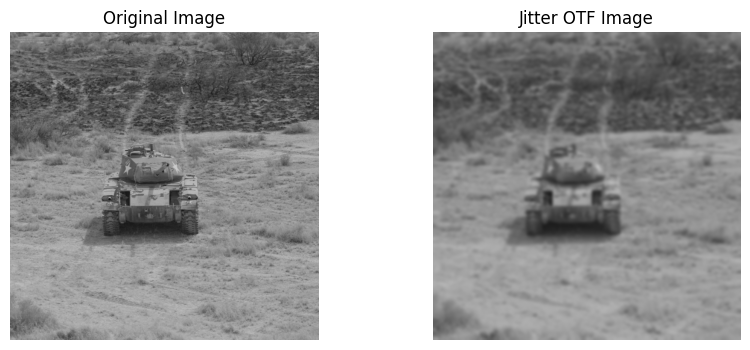
Jitter OTF
The Jitter OTF simulates the wideband jitter of an optical sensor’s line of sight. This is approximated as a Gaussian blur effect caused by minor, rapid movements of the sensor or camera, quantified by variance in the jitter intensity.
Below is some example code that initializes and applies a JitterOTFPerturber. To simulate different levels of jitter intensity, you can adjust s_x and s_y parameters. You can adjust these parameters or use your own image to visualize the perturbation and study the effect on image quality. For more information on customizing JitterOTFPerturber, see the documentation.
from nrtk.impls.perturb_image.pybsm.jitter_otf_perturber import JitterOTFPerturber

otf = JitterOTFPerturber(s_x=2e-4, s_y=2e-4)
jitter_otf_image, _ = otf.perturb(image)
display_augmented_image(image, jitter_otf_image, "Jitter OTF Image")
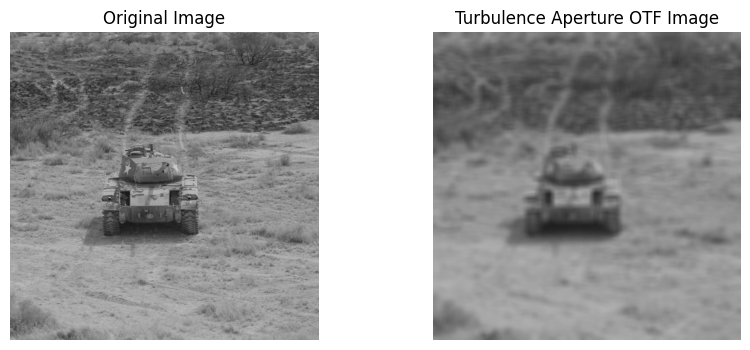
Turbulence Aperture OTF
The Turbulence Aperture OTF degrades an image by simulating atmospheric turbulence and optical aperture effects.
Below is some example code that initializes and applies a TurbulenceApertureOTFPerturber. To simulate different atmospheric turbulence and optical aperture effects, you can adjust the following parameters:
mtf_wavelengthsmtf_weightsaltitudeslant_rangeDha_wind_speedcn2_at_1mint_timen_tdiaircraft_speed
You can adjust these parameters or use your own image to visualize the perturbation and study the effect on image quality. For more information on customizing TurbulenceApertureOTFPerturber, see the documentation.
from nrtk.impls.perturb_image.pybsm.turbulence_aperture_otf_perturber import TurbulenceApertureOTFPerturber

otf = TurbulenceApertureOTFPerturber(
    mtf_wavelengths=[0.50e-10, 0.66e-10],
    mtf_weights=[1.0, 1.0],
    altitude=250,
    slant_range=250,
    D=40e-3,
    ha_wind_speed=0,
    cn2_at_1m=1.7e-14,
    int_time=30e-3,
    n_tdi=1.0,
    aircraft_speed=0,
)
turbulence_aperture_otf_image, _ = otf.perturb(image)
display_augmented_image(image, turbulence_aperture_otf_image, "Turbulence Aperture OTF Image")